Showing posts with label ROMs. Show all posts

Friday, 19 April 2013

Swift-Li Rom V2 For Micromax A110


This rom is for Micromax A110 Users
Its is a rom based on official and latest release of LEWA ZTE V970 ROM


Truely A Bugless Rom:


  • It is a beauty and beast in performance...
  • It is a blend of Cynust T2 JB and Micromax JB V2
  • So It offers best features of both the roms, as i say it i mean it...
  • I have taken the different modules from different roms...
  • Camera modules are from Micromax a110 JB V1.11, it is the best stock version for camera...
  • for Video and Graphic performances i took from Cynus T2 rom for obtimized battery as well as for free ram...
  • Ported from soc 6220 to our 6228 chipset...
  • Fully Bugless in all terms...


---Change Log V2---
-Fixed lockscreen chinese characters
-SD card mounts as Internal SD
-Fixed Bluetooth
-Fixed Gps issue(Refer Gps Procedure)
-Fixed issue with the proximity sensor in all lewa roms while calling 
-FM Works with the default Lewa FM App without any issue, even without headset 
-Made 2d and 3d Graphics cap as 60 for most fluid ui
-Gallary issues fixed
-removed youtube app
-Fixed issues with the OTG (please some one check it and revert back with result)
-So many UI Tweaks
-Free ram tweaks for HD Gaming(My Main Theme Of This Rom, Developing A Beast In Performance, Beauty In Looks which comes by default)
-Changed Boot animation to Micromax Default


---Change Log V1---

-Ported from latest lewa rom available for ZTE v970
-More Amount of free ram, best in performance
-Once you Free RAM, you are good to go to play HD Games
-Best suited dpi in lewa rom for our Device
-Unliike all other lewa roms it is fast in internet
-Changing fonts also works well...
-Fast gps fix, first download epo data
-Good wifi signal strength
-Best camera quality you can get through a110
-Both internal and external sd card are mounted
-FM works in Stock Lewa FM App 

---Flashing procedure---

*** Flash this rom over Micromax JB or Cynus T2 JB
1. Download the Rom, copy it to your sd card...
2. Reboot to CWM recovery
3. Do Data factory reset
4. Wipe Cache partition
5. Wipe Delvik cache in advanced 
6. Flash ROM ...
7. Reboot 

---Gps Procedure---

1. First Enable all options in settings-> Location&Sevices
2. Go to Epo, download Epo data
3. After downloading Epo, go to engineering mode or any other gps accessing app to get the faster gps fix...

Download Links: 


Swift-Li(V1):-
Google Docs Link

Dev Host Link

Swift-Li(V2):-

Google Docs Link

Dev Host Link


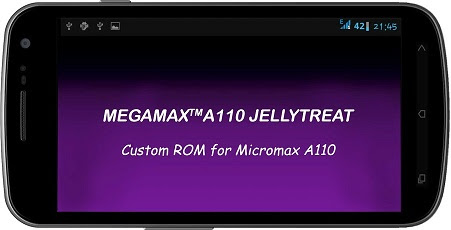
JellyTreat ROM for micromax a110 with aroma installer


FEATURES:


  • All Bloats Removed
  • Pre-Rooted
  • Zipalingned
  • Deodexed
  • Super user added
  • Aroma Installer options
  • 5 launchers options
  • Apex, Nova, Holo, Launcher8, Xperia z
  • 4 Music Players
  • Stock, Sony walkman, miui, Google Music
  • 3 Video players
  • Stock, Mx player, Easy Player
  • 3 Browsers
  • Stock, Opera, Ucbrowser
  • 4 Battery icons
  • stock, circle, CM, BigAndroid
  • 2 Keyboards
  • Android 4.2, Xperia T
  • 2 camera and gallery
  • Stock, Cymera
  • 2 Sound Recorder
  • Stock, miui
  • 3 fonts to choose
  • Stock, Rosemary, Ubuntu
  • OTG Updater
  • Ad Blocking
  • More Productive Apps
  • LMT PIE navigation
  • Power Options

Note: Do this at your own risk. We will not be responsible for anything bad happens to your phone. Follow the instructions carefully and everything will be okk.. All the Best

PROCEDURE TO FLASH ROM:


  • Install TWRP or CWM Recovery
  • Wipe cache
  • Wipe delvik cache
  • Factory Reset
  • Install Zip from sd card
  • Now you get stunning Aroma Installer to customize.
  • Click install
  • Again Wipe delvik cache
  • Fix Permission
  • Finally Reboot
  • After Boot Logo wait for 5 min to Boot-up.


Note: Rom is based on Aroma, so there some issue with fix permission. It may stuck at boot logo here is solution given by our warriers: 


Do the below given steps again with CWM recovery and you will not face problem:-
1) wipe data and factory reset.
2) wipe cache partition.
3) wipe dalvik cache(in advanced menu).
4) format cache ( in mount and storage).
5) format data from the same.
6) format system.
If system formating fails then again boot to recovery and just format system.
Now install rom and then wipe dalvik cache and then fix permission. You wont feel problem again.


Do the same as mentioned.
Options are same buddy.
Do try the process then let me know.
If its not booting then restore your previous rom or install any other rom by just go to mount and storage and then plug your phone to pc and then click on the mount usb storage option and then copy any other rom and flash it. Then install the CWM recovery 6.0.1.2 through Mobile uncle tool and you can find recovery img from few post back posted by me' then do the same process.

 
CREDITS:


  • Amrulz for Aroma Installer
  • DsiXDA for Android kitchen
  • Thilanc for Xperia z Launcher Mod
  • Rizal for Sony Media App Mod
  • Apoonet for Miui Mods
  • noname81 for LMT
  • Micromax for JB ROM v2


DOWNLOAD LINK:

MEGAMAX_A110_ROM_SERIES_V2.0.zip - 454.03 MB

OLD VERSION BELOW

   MEGAMAX_A110_JELLYTREAT_V1.0.zip - 313.10 MB

Credits: XDA-Developers
Original Thread: Click Here
Developers Profile: Click Here

Monday, 28 January 2013

How to install AOKP Jelly Bean ROM for the Galaxy S3 I747


banner-galaxy-s3-i747-i747m-aokp-rom-121220
AOKP is a well-known and well-respected ROM in the Android community for a variety of reasons. One of which is the ROM’s many customized features that involve performance enhancements. Now, thanks to the efforts of XDA Developers members Task650 & Ktoonsez, AT&T and Rogers Galaxy S3 owners can enjoy an unofficial version of the AOKP ROM.
Task650 & Ktoonsez have been working on creating a stable and workable version of AOKP. This ROM is also being actively developed and updated by the developers, so expect more features and fixes in their next update. The recent update comes with new animation options, CyanogenMod’s Chronus clock and weather widget, Navigation Bar color options, a few fixes from the older version, and more.
This guide shows you how to install AOKP Jelly Bean ROM for the Galaxy S3 I747.

Warning

  • The instructions in this guide are intended for use with the AT&T Samsung Galaxy S3 SGH-I747 or Rogers Samsung Galaxy S3 SGH-I747M. Applying these instructions on another device or model may produce undesired outcomes.
  • The information in this guide is provided for instructional and educational purposes only. There is no guarantee that these instructions will work under your specific and unique circumstances.
  • Use these instructions at your own risk. We shall not hold any responsibility or liability for whatever happens to you or your device arising from your use of the info in this guide.
  • Read and understand the whole guide first before actually performing the instructions.

Requirements

  • AT&T Samsung Galaxy S3 SGH-I747 or Rogers Samsung Galaxy S3 SGH-I747M withClockworkMod Recovery installed. .
  • Download the following:
    • AOKP Jelly Bean (aokp_JB_4.2_d2att-ota-eng.task650-1.17.2013.zip, md5sum: dc36f2b2ce9cd11b35420115216d0076)
  • Backup all personal data on your phone to make sure you have a copy of your personal data (e.g., contacts, SMS, MMS, Internet settings, Wi-Fi passwords, and the like) in case the procedure in this guide erases such data.
  • Make sure that your phone’s battery power is at least 50% to avoid interruption due to power loss that may cause damage to your phone.

Instructions

  1. Copy aokp_JB_4.2_d2att-ota-eng.task650-1.17.2013.zip and gapps-4.2-jb-12.19.2012-signed.zip to your phone’s internal SD card.
  2. Turn off your phone.
  3. Boot the phone into ClockworkMod Recovery by holding the Volume Up, Power, and Home buttons.Once in Recovery Mode, use the Volume keys to navigate through options and the Power button to select.
    • Create a NANDroid Backup. Go to Backup and Restore > Backup.
    • Select Wipe Data/Factory Reset > Yes.
    • Select Wipe Cache Partition > Yes.
    • Select Advanced > Wipe Dalvik Cache > Yes.
    • Select Mounts and Storage > Format /system > Yes.
    • Select Install ZIP from SD Card > Choose ZIP from SD Card > locate and select aokp_JB_4.2_d2att-ota-eng.task650-1.17.2013.zip > Yes.
    • Select Install ZIP from SD Card > Choose ZIP from SD Card > locate and select gapps-aokp-JB-10.12.2012.zip > Yes.
    • Select Go Back > Reboot System Now.
    Congratulations! You just flashed the unofficial AOKP Jelly Bean preview build to the AT&T Samsung Galaxy S3 SGH-I747 or the Rogers Samsung Galaxy S3 SGH-I747M.

    How to flash Android 4.1.2 Jelly Bean XXELLC for the Galaxy S3 I9300


    banner-galaxy-s3-i9300--jellybean-official-i9300xxellc-121220
    Still waiting for your Jelly Bean update for the Samsung Galaxy S3 GT-I9300? Wait no more because the latest software version XXELLC of Android 4.1.2 Jelly Bean for the Galaxy S3 I9300 has been officially released for the Spain region, which also includes Austria, Belgium, France, Germany, Hungary, Italy, and the United Kingdom.
    This official Android 4.1.2 release reportedly packs all the features you’ve been waiting for in Jelly Bean: Multi-View, Page Buddy, a new Gallery App, Smart Rotation, Paper Artist, and the Group Cast app to name a few.
    Enjoy these new features without having to wait for your updates to arrive over the air. Flash this official firmware package manually to get the Jelly Bean fix you need.
    This guide shows you how to flash Android 4.1.2 Jelly Bean XXELLC for the Galaxy S3 I9300.

    Warning

    • The instructions in this guide are intended for use with the Samsung Galaxy S3, model number GT-I9300. Applying these instructions on another device or model may produce undesired outcomes.
    • The information in this guide is provided for instructional and educational purposes only. There is no guarantee that these instructions will work under your specific and unique circumstances.
    • Use these instructions at your own risk. We shall not hold any responsibility or liability for whatever happens to you or your device arising from your use of the info in this guide.
    • Read and understand the whole guide first before actually performing the instructions.

    Requirements

    • Samsung Galaxy S3 GT-I9300
    • A Windows PC
    • Handset USB drivers installed on the PC. You may install the drivers by installing Samsung Kies.
    • Enable USB debugging on your handset.
    • Disable antivirus, firewall, and other security software. Also disable Samsung Kies and other software that accesses your phone. Such software can interfere with the procedure in this guide.
    • A file extraction tool like WinRAR or 7-Zip installed on your PC.
    • Download the I9300XXELLC firmware(I9300XXELLC_I9300PHEELL3_I9300XXELLA_PHE.zip, 805.8 MB) to your computer.
    • Backup all personal data on your phone to make sure you have a copy of your personal data (e.g., contacts, SMS, MMS, Internet settings, Wi-Fi passwords, and the like) in case the procedure in this guide erases such data.
    • Make sure that your phone’s battery power is at least 50% to avoid interruption due to power loss that may cause damage to your phone.

    Instructions

    1. Extract the I9300XXELLC_I9300PHEELL3_I9300XXELLA_PHE.zip to your computer.
    2. Run the Odin executable file from the extracted ZIP file.
    3. Turn your phone off.
    4. Boot your phone into Download Mode by pressing and holding down the Home, Power, and Volume Down buttons at the same time. Press the Volume key to continue into Download Mode.
    5. Connect your phone to your computer via USB cable.
    6. Once Odin has recognized your phone, click on PDA and locate and select the.tar.md5file you extracted from the ZIP.
      • NOTE: Make sure that the re-partition option is not ticked.
    7. Click Start in Odin to begin flashing.
    8. Once you see the “PASSED” message in Odin, wait for the Samsung logo to appear on your phone’s screen before unplugging your phone from the PC.
    Great work! You just flashed the Android 4.1.2 Jelly Bean software build XXELLC on your Samsung Galaxy S3 GT-I9300. Let us know what you think about the features by leaving a comment.

    Tuesday, 15 January 2013

    How to flash IMaGinary ICS ROM for the Galaxy Ace S5830


    Jelly Bean might be on everyone’s mind, but there are people out there who still want to sink their teeth into Ice Cream Sandwich. Though the Samsung Galaxy Ace GT-S5830 will never see Ice Cream Sandwich officially from Samsung, XDA Developers member Ahmed hamouda wants to give your phone the ICS looks.
    The IMaGinary ICS ROM is based on Android 2.3.6 Gingerbread and supports 55 languages. It’s also been pre-rooted, pre-deodexed, and has overscroll glow and CRT off effects enabled. You can also get the most out of your battery life, thanks to the Battery Extender kernel and a script to manage RAM Adrenaline Boost 3.0. A 14-toggle mod is also included, as well as an A2SD GUI script, a smooth scroll mod, and a hacked hosts file.
    This guide shows you how to flash IMaGinary ICS ROM for the Galaxy Ace S5830.

    Warning

    • The instructions in this guide are intended for use with the Samsung Galaxy Ace, model number GT-S5830. Applying these instructions on another device or model may produce undesired outcomes.
    • The information in this guide is provided for instructional and educational purposes only. There is no guarantee that these instructions will work under your specific and unique circumstances.
    • Use these instructions at your own risk. We shall not hold any responsibility or liability for whatever happens to you or your device arising from your use of the info in this guide.
    • Read and understand the whole guide first before actually performing the instructions.

    Requirements

    • Samsung Galaxy Ace GT-S5830 running on any stock Gingerbread ROM and with ClockworkMod Recovery installed. For additional help, check our guide on how to flash ClockworkMod Recovery for the Galaxy Ace S5830.
    • Download the IMaGinary ICS ROM (ImaGinaryICS_Final.zip, 105 MB) to your computer.
    • OPTIONAL: Download patches you’d like to flash:
    • Make sure your device’s battery still has at least 70% power. You don’t want the device to shut down in the middle of the procedure.
    • Backup all personal data on your phone to make sure you have a copy of your personal data (e.g., contacts, SMS, MMS, Internet settings, Wi-Fi passwords, and the like) in case the procedure in this guide erases such data.

    Instructions

    1. Copy the IMaGinary ICS ROM to the Galaxy Ace’s SD card.
    2. Turn off the Galaxy Ace.
    3. Boot the phone into Recovery Mode by holding down the Home and Power buttons. When you see the Samsung logo, release the Power button but still hold down the Home button.
    4. Make a NANDroid Backup by selecting Backup and Restore > Backup.
    5. Select Wipe Cache Partition > Yes.
    6. Select Advanced > Wipe Dalvik Cache > Yes.
    7. Select Advanced > Wipe Battery Stats > Yes.
    8. Select Wipe Data/Factory Reset > Yes.
    9. Select Install ZIP from SD card > Choose ZIP from SD card > select the IMaGinary ICS ROM file > Yes.
    10. Select Wipe Cache Partition > Yes.
    11. Select Advanced > Wipe Dalvik Cache > Yes.
    12. Select Advanced > Wipe Battery Stats > Yes.
    13. Select Wipe Data/Factory Reset > Yes.
    14. OPTIONAL: If you’d like to flash any of the patches, do the following:
        • Select Mounts and Storage > Mount /system.
        • Select Install ZIP from SD card > Choose ZIP from SD card > select the patch of your choice > Yes.
        1. Select Reboot System Now.
        Congratulations! Your Samsung Galaxy Ace GT-S5830 is now running on IMaGinary ICS ROM.

        How to flash Jedi Invasion ROM for the Galaxy S3 I747


        The things you can enjoy on Android just don’t seem to run out, especially for a device like the AT&T Samsung Galaxy S3 SGH-I747. Our ever-crafty developers from the XDA Developers forum always have something new for users to try, especially for those who want to push their phones beyond manufacturer limits. One of these ROMs has just been ported by XDA Developers member ptmr3 and its name is the Jedi Invasion ROM. This Star Wars-inspired ROM is based on Android 4.1.1 Jelly Bean UVDLJA firmware, and has been rooted, debloated, deodexed, and zipaligned. It even comes with BusyBox and SuperSU.
        ptmr3 totally rebuilt the Jedi Invasion ROM and has injected it with Bravia 2, 23 toggles, Lindroid settings, init.d edits, and faux mainline. It also comes with CPU Sleeper for efficient processor usage, Awesome BEATs for better audio, and tweaks for network speed, battery, and performance. If you want to feel the Force, the Jedi Invasion ROM is the way to go.
        This guide shows you how to flash Jedi Invasion ROM for the Galaxy S3 I747.

        Warning

        • The instructions in this guide are intended for use with the AT&T Samsung Galaxy S3, model number SGH-I747. Applying these instructions on another device or model may produce undesired outcomes.
        • The information in this guide is provided for instructional and educational purposes only. There is no guarantee that these instructions will work under your specific and unique circumstances.
        • Use these instructions at your own risk. We shall not hold any responsibility or liability for whatever happens to you or your device arising from your use of the info in this guide.
        • Read and understand the whole guide first before actually performing the instructions.

        Requirements

        • AT&T Samsung Galaxy S3 SGH-I747 with root access and with ClockworkMod Recovery installed. 
        • Download the Jedi Invasion ROM (InvasionRebuiltPORT.zip, md5sum: 7d90a6506773d5ed502edb7a2cb41bfa).
        • OPTIONAL: Download the add-ons of your choice.
        • Make sure your device’s battery still has at least 70% power. You don’t want the device to shut down in the middle of the procedure.
        • Backup all personal data on your phone to make sure you have a copy of your personal data (e.g., contacts, SMS, MMS, Internet settings, Wi-Fi passwords, and the like) in case the procedure in this guide erases such data.

        Instructions

        1. Copy the Jedi Invasion ROM to your phone’s internal SD card.
        2. Turn off your phone.
        3. Boot into ClockworkMod Recovery by holding down the Volume Up, Power, and Home buttons.
        4. Create a NANDroid Backup. Go to Backup and Restore > Backup.
        5. Select Wipe Data/Factory Reset > Yes.
        6. Go to Mounts and Storage and select Format /system.
        7. Select Install ZIP from SD Card > Choose ZIP from SD Card > Select the Jedi Invasion ROM.
        8. Select Wipe Cache > Yes.
        9. Select Advanced > Wipe Dalvik Cache > Yes.
        10. Select Advanced > Fix permissions.
        11. Select Go Back > Reboot System Now.
        12. Do not touch your phone for 10 minutes.
        13. Reboot the phone.
        14. OPTIONAL: To install the add-ons of your choice, boot into ClockworkMod Recovery and repeat step 7.
        Nice work! You have flashed the Jedi Invasion ROM to your AT&T Samsung Galaxy S3 SGH-I747. How is it compared to your previous ROM? Let us know by leaving a comment below.

        Sunday, 13 January 2013

        How to install creed v4 rom on galaxy y gt-s5360

        Here is the creed rom v4 for galaxy y users.
        This rom has some bug fixes as said by its developers. But its up to you to download it and try, if you think there are still some bugs then report it to us by commenting or on the developers page. I am sure it will help.

        By the way lets get to the point now. Its a really smooth and awesome ROM. If you have tried creed v3.5 then you would know that.

        Here are some screenshots of it:

        Screenshots:


        Features:

        *Overclocked -819Mhz with no Battery Drain
        *Undervolt 
        *Ext4 File System
        *17 Governors For Performance
        *Most Advanced Touchwiz Launcher (Creeds Home)
        *13 Seconds to Bootup
        *Performance Hacks
        *Display+Sound Hacks
        *15 Status Bar Toggles
        *Swipe to Remove Notification
        *Extended Power Menu
        *7 Lockscreen Mod
        *Various New Settings

        Warning:

        Use it at your own risk, if something wrong happens(like bricking your phone or something else) we will not be responsible. So please follow the steps carefully and enjoy. Don't freak out, its our job to tell you.

        Download Links:

        • First download the zip file and copy it in your sd card.
        • Now make back of your data and contacts.
        • switch off your phone and restart it in recovery mode(Volume up+power+home key)
        • Now wipe data and cache
        • Now select apply update from sd card
        • Choose the zip file you downloade and install it.
        • Reboot you phone, it can take some time to start for the first time.
        • You have done it enjoy.
        Problems feel free to comment...
        Original thread: XDA-Developers


        Ultimate Super Sonic ROM v7 for Galaxy Y Young (with update)

        Here is the new rom for your galaxy y gt-s5360. This ROM is developed by the XDA Developers' member evanlocked. So please take some time out to thank him.

        Ok now back to work, this ROM is really smooth and beautiful. Take a look on some screen shots:

        Screenshots:


        Features: 

        *LATEST FIRMWARE DXLF1
        *deodexed all apk
        *Epm
        *4wayboot
        *20toggle lidroid
        compatible with music app
        *statusbar mod greper added
        *paranoid taste
        *adrenaline boost
        *edt fully working now u can hide clock
        *multylanguage
        *fast actually like sonic
        *compatible with adrenaline engine/kuro tweak/v6 etc just experiment with it
        *bravia hack added pre installed
        *transparent backgrounds on apps
        *6lockscreen
        *etc many more just try to tasted it

        Requirements: 

        • A samsung galaxy y running on the latest version of gingerbread(2.3.6)
        • Zip file of the rom
        • update file

        Download Links:


        Passwords: mahogilagangnamstyle
        This rar package contain rom and update soo just estract the multy package enjoy
        Install two off them

        Credits:

        finn as mirrored one package rom
        Sent from my GT-S5360 using Xparent ICS Blue Tapatalk 2

        Instructions:

        how to:
        this rom not contain any kernels soo it will booted up in stock kernels or other kernel

        -boot to cwm
        -do full data wiping and cache
        -install zip from sdcard
        -choose zip file of the rom
        -wait till done
        -reboot system now
        -enjoy
        dont forget to flash the update


        Comment if you want to ask something

        Friday, 11 January 2013

        Everything(ROMs, Patches, Tweaks, Recovery, Rooting) for A110 (Micromax Canvas 2)


        ROMS:

        Stock:

        Stock ROM V1 - http://d-h.st/NOR
        Stock ROM V2 - http://d-h.st/0lp
        Mobistel Cynus T2 ROM - http://www.sendspace.com/file/usu6q7 (Flashable zip)

        Flash tool - http://goo.gl/4tyQ5

        Custom ROMS:

        JMP Xtream - http://bit.ly/ZacyS2
        Dr.Bhokali ROM - http://bit.ly/Zrslki
        Radeon ROM - http://d-h.st/PnP

        Drivers:

        http://bit.ly/13bkuq2

        Rooting:

        Rooting Tool - http://bit.ly/WAuST3

        1. Enable USB De-bugging from Settings- Developer Options - USB Debugging
        2. Download and Extract the Rooting tool in a single folder
        3. Make sure the Drivers are installed
        4. Right click on the 'Runme.bat' in the rooting tool and click 'Run as Administrator'
        5. Connect the device and press '1'
        6. Wait for the process to complete

        Recovery:

        Stock - http://bit.ly/137WVzj
        Clockworkmod - http://bit.ly/WidRft

        1. Download 'Mobile Uncle Tools' from Play Store.
        2. Make sure your Phone is rooted
        3. Rename the recovery you want to flash to 'recovery.img' and place it in the root of 
        your SD card.
        4. Select 'Recovery Update' in 'MUT' and select the recovery.img from the list.

        Storage Swapping:

        Download - http://d-h.st/LFT

        1. Install 'Root Explorer'
        2. Using Root Explorer go to /system/etc and rename the file 'vold.fstab' to 'vold.fstab.bak'
        3. Paste the downloaded 'vold.fstab' file to /system/etc and give system permissions
        4. Reboot!

        init.d Support (Required to run Supercharger):

        1. Download 'Busybox Insatller' from Play Store.
        2. Install Busybox 1.18.2 from 'Busybox Installer'
        3. Download 'Script Manager' from Play Store.
        4. Using 'Root Explorer' create a folder in the name of 'init.d' in /system/etc and give system permissions
        5. Download the script from this link - http://bit.ly/WBY4ca
        6. Open 'Script manager and browse to this script and run it as 'Superuser'
        7. Reboot!

        SuperCharger (After Enabling init.d):

        1. Download Supercharger script - http://bit.ly/oBhiFg
        2. Open 'Script Manager' and browse to the downloaded script.
        3. Run it as Super user and the select the option you want
        4. Reboot!

        Entropy Seeder:

        Use this to enhance your gaming experience and smoothness

        1. Download Seeder Entropy - http://bit.ly/13bnMtm
        2. Then flash this Zip through CWM - http://bit.ly/Uv8Fuy
        3. Wipe cache and Dalvik Cache.
        4. Reboot!. 

        12mp Camera Patch:

        Flash via CWM this to use 12mp rear and 1.3mp front camera - http://bit.ly/Williy


        Source: XDA-Developers

        Developer's Profile: Click Here

        Custom ROMs(JMP Xtream, Bhokali ROM, Radeon ROM) for Micromax Canvas 2


        Here are three custom ROMs for mmx canvas 2 A110. 
        To install these ROMs your phone should be rooted and also have CWM recovery.
        If you don't have any one of these then Click here for the tutorial to root your MMX A110 and CWM recovery

        Okk if done then you can install any one of these three ROMs

        First download the zip files from links given below:

        For JMP Xtream click here

        For Bhokali ROM Click Here

        For Radeon ROM Click Here

        and now you can install these ROMs by putting your desired ROM's zip file in your sd card and following the old CWM method. Don't forget to take the backup of your data first!!!! Have Fun......

        Any problems then comment.....

        Mobistel Cynus T2 ROM for Micromax Canvas 2

        Here is a new ROM for mmx Canvas 2 A110.
        This is a flash able ROM.
        Download the flash tool and ROM's zip file and enjoy....

        Download Mobistel Cynus T2 ROM Click here

        Download Flash Tool Click Here

        Have any problem or issues then please comment and let us know

        Adrenaline ROM For Galaxy Ace


        Features:
        ✔ Stock XWKT7 CWM Flashable Zip
        ✔ Full Deodexed
        ✔ ULTRA Lite [ Only 76.55mb ROM Size ! ]
        ✔ Modified Nims Kernel For more information.
        ✔ Adrenaline™ CPU Control Preinstalled
        ✔ Adrenaline Boost™ Preinstalled
        ✔ Adrenaline™ Task Manager Preinstalled
        ✔ DNS Changer to access blocked website
        ✔ Special edition of Adrenaline™ Engine Included (No other ram script/tweaks needed )
        ✔ Build.prop Tweaked
        ✔ Default install location at SD Card

        Backup your current firmware and contact to sd 1st before u do this !


        Installation:

        1.Agree to the disclaimer:

        Quote:
        No one will be responsible for any problem (bricked phone,dead sdcard, etc) this rom caused to you. By installing this rom, you agreed to this.

        2. Copy 'XWKT7 Adrenaline ROM FINAL.zip' to your phone SD card
        3. Reboot your phone to CWM recovery mode
        4. Flash XWKT7 Adrenaline.zip
        5. Format your /sd-ext partition
        6. Reboot your phone
        7. Done


        Screen Shots:


        Have any problem then please comment and let us Know.....
        We will try our best to solve that...

        Source : XDA Developers

        Show original thread: XDA-Developers

        Monday, 7 January 2013

        Upgrade Micromax A110 Canvas 2 To V2 ROM


        \\\
        Micromax A110 canvas 2 is most popular phone by Micromax and the company has released V2 ROM for A110 as per requests of its users. This V2 ROM is running on Android 4 (ICS).


        V2 ROM contains new and improved features. V2 ROM has got fixes in dial pad, 503 MB of internal storage has been extended to 1GB and 2GB of SD Card allocation to 1GB, Fixed GPS Bug, WiFi disconnection problem, LED Flash intensity has been doubled than V1 and Now you move your apps to SD-card without rooting like changes is implemented.
        If you are planning to have V2 ROm just follow my steps:
        • Firstly you need Micromax A110 V2 ROM, you can download it by clicking link below:
        •  Rooted Micromax A110
        Steps
        • When you have downloaded the CWM of Stock ROM V2 then extract it anywhere you want and then transfer the extracted Folder to /sdcard/clockworkmod/backup/folder.
        • Switch off your mobile.
        • Then click or press Volume Up+ Volume Down+ Power Button until a option will appears asking you to go to Recovery mode or factory mode; then press Volume Up button to go to factory mod or clockworkmod recovery menu. And press Volume Down button to Backup and Restore.
        • When the backup completes choose to restore options to restore V2 ROM.
        • Let the process to be complete and then after that clear the Dalvik Cache present in advanced menu of the cwm recovery.
        • Reboot your Phone, if your device takes more time than usual then don’t be panic because Dalvic cache will be regenerated.
        • And for re-checking of your work  go to Storage section, if the internal storage section is changed then you have successfully accomplished your task.
        If you are facing any problems then you can contact us.

        Saturday, 5 January 2013

        Cyanogen Mod 7.1 for Xperia Play with installation guide


        Step by step guide to installing Cyanogen mod custom roms (Xperia Play example)
        In this tutorial, we are going to take you through the process of flashing your Xperia PLAY with the latest Cyanogen Mod and adding the Google Apps to it.  Cyanogen are a team of masterful developers that have modified the latest version of Android with some incredible cool development tools, allowing you to optimize the performance of your PLAY.  In the previous section, you would have learned how to install modified boot files.  Some of these processes you will need to remember for this tutorial.

        Warning installing this custom rom will change your phone completely as you remove the Sony software and install an operating system that a bunch of geeks have made in their sudios.  If you are worried about damaging your Xperia PLAY or do not have the patience to find fixes if something goes wrong then do not proceed.  We provide this guide for those who want to join the rooting community, we do not offer the support if things go wrong but only guidance to avoid these things from happening.  Do you want to continue... ofcourse you do!
        Download & Install Cyanogen Mod 7.1

        So to start off you will need to visit the release page on Cyanogens site to download the Zip files you will need for this tutorial. Go to: This Link Keep this website open as you will need to download more than one file.
        Step 1 - You need to download the CyanogenMod Zip file.  Choose the mirror link download, make sure the downloaded file is: update-cm-7.1.0.1-XperiaPlay-R800i-signed.zip or higher as 7.1.0 version does not work.

        step 2 - Plug in your Xperia PLAY and copy the complete downloaded ZIP file straight to your SD card.  Just place it in the main window, no need for sub folders.  When finished, unplug & turn off phone.
        step 3 - On your PC, open the ZIP file and copy the boot.img file inside to the /fastboot folder that was used for the bootloader process.  If you remember from the last tutorial, we put all of the boot files into this folder before executing the code in the DOS window. We are now ready to flash your handset with the new Kernel, as the last one will not be compatible with Cyanogen Mod


        step 4 -.  Whilst holding down the shift key, right-click the /fastboot folder that you just placed boot.img inside and select Open command window here.  Do this before plugging in your Xperia PLAY, copy the text fastboot flash boot boot.img into the black DOS window and hit enter.  It will say 'Waiting for device'.  Now plug in your Xperia PLAY in boot mode, which if you can't remember is whilst holding down the search key.  The LED on your phone will light up blue, the image file will install it's stuff onto your PLAY.  Wait till the code has finished.  You will now have the Free Xperia kernel when complete.


        step 5 -Now you will start your phone in recovery mode which you probably haven't seen before.  Hold power button to turn on but as soon as you feel it vibrate press volume key down several times.  After you see the Free Xperia logo, it should enter the recovery mode, which should look like this.

        At this point you can't use touch screen so instead use the hardware keys for navigation:

        Volume keys = Up and Down
        Power button = Back
        Home button = Select.

        Step 6 - Now you have to clear the cache & settings before loading the CyanogenMod.  You have to do this otherwise you will get stuck in a bootloop which isn't fun. To do this highlight Wipe Data/Factory Reset and select (home key) then yes, you might see a few no's but there will be a yes.  Let the code do its thing and wait for it to finish. Then repeat this for Wipe cache partition and wait for the code to finish

         Step 7 - Now to install the CyanogenMOD.  Select Install ZIP from SD Card and then Choose ZIP from SD Card, then from the browser select the ZIP folder you copied earlier and enter.  It should be: update-cm-7.1.0.1-XperiaPlay-R800i-signed.zip
        Now handset is being flashed with CyanogenMOD, when completed the code lines will say 'Install from SD Card complete'.  Now to restart your phone, just scroll to Reboot System Now and select.  Your handset will now boot in the new CyanogenMOD 7.1 software.

        WARNING - Make sure that you follow all of these setps and erase the cache & settings before installing the ZIP file.  If you don't you can be trapped in a bootloop where several conflicting files prevent the PLAY from starting properly.


        Download & Install Google Applications


        I am not 100% on the reasons why but CyanogenMod does not come pre installed with the Google applications or Market.  These you have to install manually using the recovery mode you were just playing with.

        Step 1 - Go back to the CyanogenMod website you should have open from earlier and download the Google Apps ZIP from the Google apps addon section.  This ZIP file should be called: gapps-gb-20110828-signed.zip.  Copy this to the Micro SD card of your Xperia PLAY and when copy has finished, unplug and turn off.

        Step 2 - Now to install this ZIP file, you have to repeat the same process as you did above with CM7.  Turn on handset in recovery mode by tapping the volume down key.  Wait for recovery mode to boot up, this time you wont have to wipe anything just install as only an add on to your custom rom.

        Step 3 - Select from the menu using the volume and home buttons Install ZIP from SD Card and then Choose ZIP from SD Card.  Then select the Google Apps ZIP file which should be gapps-gb-20110828-signed.zip.  When this has finshed writing you may restart the phone again.

        After completing these guides, you will now have a fully fledged rooted Xperia PLAY with the latest custom software from creators CyanogenMOD.  This includes the most up to date Android version 2.3.7, Root User access & the clover monkeys have even worked on Sony Ericsson code to return to you the ability to still purchase & download official Xperia PLAY Games.  Now one thing that I must warn you about, this CM7 software will have the limit of processing power set to 1500Mhz (1.5GHz), which is bordering the limit of the processor.  Supposedly this shouldn't do any damage but we feel it's much safe to reduce this to 1200 or 1300 MHz, just to be on the safe side.  To do this, got to

        Settings> CyanogenMod Settings> Performance> CPU Settings> MAX CPU frequency.

        Twitter Delicious Facebook Digg Stumbleupon Favorites More